Friday, November 14, 2014

Citric Acid: Some Sour Truths

When I think of citric acid, like most of you I see lemons, limes, and oranges. Unfortunately, that is not the case. Citric acid is produced by these foods and many others. But, the citric acid that is added to foods is not from these foods.


What is citric acid?
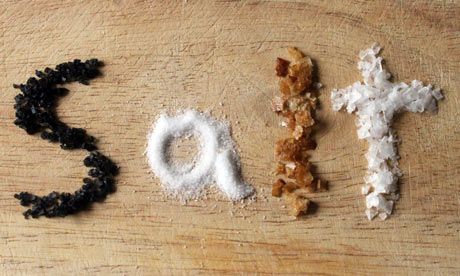
Citric acid is what makes our food sour or tart. While researching this, I learned that citric acid is used in everything from soda to varnish remover. It is in practically every food you buy. A lot of people that can their own food use citric acid as a preservative. This form is usually a white powder that is similar in taste to lemons.


How is citric acid produced?

While citric acid is found organically in food, the citric acid used in foods in your local grocer, is not the same. Because of the expense of using citrus fruits, companies manufacture citric acid using the A.niger mold. Yes mold! This mold feeds on corn syrup glucose. Most of us know by now that corn is one of the most genetically modified foods available.

Here are 2 examples of the A. niger mold. As you can see, this is the same mold found on food improperly stored and in your bathroom!


Is citric acid organic?

Because citric acid is water soluble, it is considered an organic acid. But, the USDA does allow up to 5% of non-organic substances to be in food labeled organic and up to 30% in food labeled "made with organic". this can be up to 50 different substances! While I am no expert, that sounds like a lot of non-organic stuff in "organic" food.

Is citric acid unhealthy?

I think that is really for you to decide for yourself. There are no guidelines in place as to how much is too much. Knowing that citric acid is manufactured from a mold that feeds on corn, is enough for me to seriously look at what I buy. I do can some of my own food but, I have never used citric acid. I think for home canners using the real thing (lemon juice) is an inexpensive thing to do.

I did find this article that looks at citric acid from a dentist's perspective. As a mom that raised a daughter that was addicted to the candy "war heads", I can attest to the fact that her teeth suffered due to this. As a matter of fact, her dentist told me she was better off eating a half a gallon of ice cream instead of one package of this candy!

There are forums and comments on many sites from people that have developed allergies to citric acid with some pretty harsh side effects. It would seem that while this additive sounds natural it is anything but.

I hope this has enabled you to make a better informed decision concerning what you eat. We should not be afraid of our food.


Wednesday, November 12, 2014

Cold Frame Gardening

If you live in a colder climate, cold frame gardening can extend your gardening season through autumn and even into winter! Cold frame gardening is also great for starting seedlings in the early spring for summer planting or for root vegetable gardening and many tender plants such as lettuce.

While there are a few basics to keep in mind when building and placing your cold frame, you can let your budget and your imagination be your guide. You can build your frame out of almost any material ranging from bales of hay to concrete or brick. Building a cold frame is a great way to re-purpose wood and windows. All you have to remember is that you need 4 walls to trap heat and moisture and clear lid to let in the light. This can windows, plexi glass, or plastic sheeting.

Your lid size will determine the size of your cold frame. They can be as large as you want to make them, but usually they are no larger than 3x6 with the back at least 4-6 inches higher than the front.

You will want to place your cold frame facing south with good drainage and some protection from the wind. If you have an area that is slightly sloped, this would be ideal. You can make your cold frame a permanent fixture or design it so that you can break it down when not in use.

Temperature is the key to gardening with a cold frame. You will want the temperature to be cool instead of warm. You can adjust the temperature by raising the lid. Just be sure to close it at night. If it is extremely cold, you may have to add some additional insulation such as hay, old blankets or newspapers to the top.

Cold frames are also great for storing dormant plants over the winter. You will want to place them in pot and cut them back before storing. Place them tightly in the cold frame and add leaves or mulch to any gaps.

Cold frames are great to start seedlings since they will be better acclimated to the climate outside. If you are using a portable cold frame, make sure to have it up and ready at least 2 weeks prior to starting your seedlings to give the soil time to get warm.

Here are a couple of sites that offer much more information regarding temperature regulation and ideas for types of plants that you can grow in your cold frame.

As always your comments are welcome!

Saturday, October 25, 2014

Change The World Wednesday: Small Things

My friend Small Footprints has challenged us on her blog Reduce Footprints, to "amp up" or begin to do one little thing that can make a difference. She lists several things that we can all do to make a difference in our lives. These may seem like small things, but, it is the little things that add up.

Here are some of the things we do in our home that make a "small difference".

Paper Towels -  I try to use as few paper towels as possible. I find that we tend to use a lot of paper towels without even realizing it. I keep tea towels handy for drying hands and dishes in the kitchen. Instead of using paper towels for napkins, I have towels that I have cut up in large squares to use. You could also use cloth napkins that are available in most home stores.


Newspapers -  While I do recycle a lot of newspapers, I have found uses for them around the house also. They are great to use in the garden as a weed barrier. You can use them as book covers for your kids. The comics make great wrapping paper for children's gifts. And last but not least, newspapers are great for cleaning windows. They provide a streak free finish to windows, mirrors and windshields.


We have replaced light bulbs in most of the lamps and everyone has become better at turning off lights and electronics when not in the room. I also have lots of house plants to not only improve the air quality of the house, but they add that little extra warmth to the overall decor.


Water - My neighbor gave me a Brita water pitcher which I love! Now instead of buying bottled water, I can keep water in the fridge and use a reusable water bottle to carry with me.


While this may not seem like a lot, it does add up in the long run. If we all do just one thing or a few things, together we can change the world!

Tuesday, October 21, 2014

Chemical Free Weedkillers: Do They Work?

If you have looked in your garden or flower beds, you have noticed the ever present weed. If you are like me, you just pull it up and keep going. However, there are some pretty persistent weeds out there that can be daunting to get rid of to say the least.

In some areas of the yard and garden you can use "natural" weedkillers such as vinegar, borax, salt, or baking soda. Or, you could go totally green and just continue to pull them. I have several of those persistent weeds in my beds and yard. Unfortunately, I may have to revert to chemically treating them to get them under control. But, not just yet! 

Borax as a weedkiller can be good and bad depending on the amount used and the area you are treating. There are many recipes for using borax as a weedkiller on the web but, you do need to keep in mind that less is more in this case. A University of Wisconsin researcher has noted that too much boron will kill all vegetation. Since the chemical does not degrade please use sparingly or nothing will grow in the affected area. 


Salt is another option. But, which salt? Table salt? Epsom salt? Rock salt? Salt is salt so you can use whichever type you prefer. You need to exercise caution when using salt. Fertilizer is a salt so if you have ever used too much fertilizer, you know that plants can "burn up". It will also get into your soil and can stay there for a very long time causing damage to distant plants. Salt can be used sparingly  in driveways and sidewalks.


Vinegar is probably the most popular item used for weed control. Vinegar like salt, removes the moisture from plants. So while leaves may dry up and die, the root may still be able to produce weeds. Vinegar is not selective so it will kill whatever it comes in contact with. As with the above listed items, vinegar should be used with caution. 


Most recipes call for the addition of soap. You will want to use regular dish soap. Jerry Baker recommends that you do not use an antibacterial dish soap. The addition of soap helps the liquid to stick to the leaves and lets you know where you have sprayed.

There are some natural weedkillers that are available through your local home improvement center or the web. The recipes available for the above listed items are endless. Remember what worked for that guy in Minnesota may not work for your garden in Georgia. I did find this article that addresses some other issues with natural weedkillers. 

If anyone has tried any of these items as a weedkiller please feel free to leave your results below. As always, I would love to hear from you!

Tuesday, October 14, 2014

Willow Water: Nature's Root Planting Hormone


We have all seen that one tree or plant that makes us wish we had one exactly like it. While there are many plants and trees that can be grown from cuttings, there are just as many that require a root hormone to get a cutting to grow. If you look at your local nursery or home garden center, you can find many root planting hormone products. These can be liquid or powder in form and require very little to get you started. But, why buy when you can the same thing for free?

I have been very fortunate with my plants. With the exception of a very few, they have all been given to me by friends and family. Most of my plants came from cuttings or were given to me as small plants that had a good established root system.

But, my neighbor has this beautiful blossoming cherry tree that I would love to get a cutting from! So in my quest for a greener way to do things, I started searching the web. I found this very interesting article on making Willow Water to use as a root hormone for plants. What is really great about this method is that it is easy, relatively fast to do and free! No trips to the nursery, no powders that may or may not work after an extended period of time, and I don't have to find a place to store anything!


Before I give you the recipe please note that you can use any member of the Willow family including pussy willows! So look around your yard or neighborhood or park for willow trees to make your own root hormone.

Willow Water:

1. Collect first year twigs and stems of any willow species,these have green or yellow bark. Don't use older growth that has brown or gray bark.

2. Remove all the leaves as you do not need these. You can add these to your compost or mulch in the garden.

3. Take the twigs and cut them in to about 1" long pieces.

4.  The next step is to add water. There are a couple of ways to extract the natural root planting hormones:
     A) place the twigs in a container and cover with boiling water, as in making tea and allow the "tea" to sit overnight.
     B) Place the twigs in a container and cover with unheated tap water and let is soak for several days.

5. When finished, separate the twigs/stems from the liquid by pouring carefully or using a strainer. Your liquid is now ready to use! You can store it in an airtight container in the fridge for up to 2 months.

6. To use, just pour some into a small jar and put the cuttings in the liquid and leave overnight or for several hours so they can soak up the plant rooting hormone. Then prepare them as you would when propagating any other cuttings.

The second way to use willow water is to use it to water the propagating medium in which you have placed your cuttings. Watering twice with willow water should be enough to get them on their way.

I can't wait to try this with roses and hydrangeas from my sister's garden and of course the cherry tree from my neighbor!

As always I would love to hear your comments. Happy rooting!

Monday, October 13, 2014

Raised Bed Gardening: Some Pros And Cons


This year was my first year to try and do some raised bed gardening. While the above photo is not my bed, hubby and I did construct a similar bed. Since this was my first year to try this, I am not completely sold on it yet. But, I am hoping that with some of my new found knowledge albeit trial by error, that next year will be a better year for me.

You can construct a raised bed out of almost any type of material. I used 2x6s that were treated. I know this is not the way to go now, but at the time I using what was within my limited budget. I also used weed barrier cloth that was given to me to line the bottom. You could use newspapers or cardboard to put in the bottom of your bed to keep the weeds away.

You can construct your raised bed from many different options depending on your budget. I have seen beds made with cinder blocks, cedar, re-purposed wood, and many types of stone including brick and what is known around here as "Arkansas flat stone". The possibilities are endless.


I think the biggest advantage for me with a raised bed was that it was easier to work. Because I filled it with compost, I did not need anything other than basic gardening tools to work the dirt. I also liked the fact that weeds are at a minimum since the area is confined. I really enjoyed trying to plan out what to plant where and how to maximize my space. Also, now that the season is almost over, I can use my bed as a compost bin which is a great advantage.

Other than the initial expense involved in constructing a raised bed, water is the biggest issue. Because the area is raised, it drys out faster and it takes more water to keep things growing properly. My tomatoes suffered from "leaf curl" which I later learned was caused from irregular watering. I would recommend that you consider how much you can or are willing to water before you use a raised bed. I do have a rain barrel and a soaker hose that I used but, I still needed to water on a more regular schedule.

If your soil is mostly clay or some other hard soil, or if you live in an area with contaminated soil, a raised bed is a good option if you want to grow your own food. This article is a very good place to start to learn what you can plant safely in contaminated soil. She also lists some of her own pros and cons of raised gardening.

Soil "shrinkage" is another disadvantage with this method. This is easily remedied by using your beds as a compost bin during the off season. Raised beds are nothing more than big containers so keep that in mind when planning your garden. You can go here to read 5 common problems and solutions with raised bed gardening.

If you fill your raised bed with compost, your ph should be around 6 or 7 which is neutral (good). I am not well versed in all the ph lingo but, I do know that you should have your soil tested before you just start adding things like lime and other chemicals. Lime takes a while to get into the soil so you will want to add that at the end of your growing season so that it has time to get into the soil.

Nitrogen is another nutrient that you will hear people tell you to add to your soil. There are plants that will naturally add nitrogen to your soil. You can also add coffee grounds to your soil. If you have access to chickens, their droppings are a good source of nitrogen for your garden. I found this article concerning nitrogen that gives some great advice on how to test for nitrogen in your garden.

Raised beds can be a great option for many experienced and novice gardeners alike. If you think you have a "brown thumb", I would suggest some fuss free plants to give you some confidence in your growing abilities. I would also start small if you have limited funds. Look around you and see what you have that can be re-purposed into raised bed materials. Think outside the box and surprise yourself with your own ingenuity!

As always I would love to hear your comments and tips!


Wednesday, October 8, 2014

Fair Trade Coffee: Is It Really Fair?


I love coffee. I mean I really love it. I could and do drink coffee at all hours of the day and night. In my quest to live a greener life, I have had to look at the coffee that I don't seem to be able to live without for long periods of time.....like 5 hours or more.

There are a lot of words that are thrown around the "environmental movement" that are Greek to most of us. Fair Trade Coffee is one of them for me. Exactly what is Fair Trade Coffee? Is it the same as organic coffee? Is it readily available for the masses? Is the cost preventing most of us from purchasing it on a regular basis? These are all valid questions that you may be asking yourself. While there is a plethora of information out there, the jury is still out on how beneficial purchasing Fair Trade Coffee actually is for the "common" coffee farmer.

Fair Trade Coffee in a nutshell is coffee "that is certified as having been produced to fair trade standards." Now in theory Fair Trade Coffee sounds like a great idea.If we can use our dollars to purchase items that are helping others to get a decent wage, promote sustainable farming practices and get better import/export conditions for the farmer, that is a good thing right? I would have to answer yes and no. Yes, it is a good thing to help the smaller coffee farmers earn a decent living. It is also a good thing that these organizations help with better farming practices that are short and long term better for the environment. However, there are several organizations within the Fair Trade family but there seems to be little organization.  

Not all organic coffee is Fair Trade coffee. Organic refers to the growing methods used. Fair Trade is more of a social issue than an actual farming method. As most of us know, commercial farmers use harmful pesticides, mass production often using GMOs and destroying land unnecessarily in the process. By buying organic coffee, you can usually be assured that strict rules have been followed to ensure that the above listed issues have been eliminated from the farm(s).

So I know you are wondering about your Venti Mocha Latte with that extra shot of espresso. I mean when you pay upwards of 6 bucks for a cup of coffee, it should be organic AND Fair Trade in my opinion. Well, I went to Starbucks' website to set my mind at ease. This company has their own responsible growing program along with purchasing Fair Trade organic coffee. Starbucks coffee is available at most supermarkets so you can purchase your own to brew at home.

There are several organic coffees that are readily available through websites, grocers and coffee clubs. However, if you are looking for organic and Fair Trade, be prepared to dig a little deeper. Equal Exchange offers a variety of Fair Trade, organic coffees that are available here. For more information on the difference between organic and Fair Trade, you can check out this link.  This site has older data but, it gives you an idea of just how much Fair Trade coffee is being bought by grocers, coffee houses and the like. The latest data is from 2011 so bear that in mind. However, it does list several companies that only buy Fair Trade coffee which can give you a starting point.

Last but not least, your Fair Trade coffee should have the Fair Trade Logo on the bag. Below are the two most common logos that I found. Now if your pocket book cannot not afford Starbucks or Equal Exchange, Sam's Club sell Free Trade coffee and that is readily available at your local Wal Mart!

As always I would love to hear your comments on this issue. Please feel free to comment below!


Monday, September 29, 2014

Naturally Treating Sumac Part 2

If you decide that trying to treat your case of poison ivy, poison oak, or poison sumac naturally is the route for you, there are some things to keep in mind.

First, this is not a "quick" remedy. Depending on the severity of your outbreak, it could take a few weeks. The key is to catch it early and make changes to limit the spread of the rash. I don't know if I would recommend trying this method with young children. They may not be able to handle the discomfort for the duration. This method also requires a lot of work. You have to be consistent and remain diligent in your efforts to succeed.

The first thing you will have to do is cut your nails. If you have acrylic nails, I recommend having them removed. The reason is because the oils from the plant get under your nails and if you touch another part of your body, then you will risk spreading the rash.

You will also want to wash any gardening tools that have come in contact with the poison. The oils from sumac can stay on your gardening tools for YEARS so get some soap and water and wash them up.

You will be doing lots of laundry. Lots and lots of laundry. In my house everyone hangs their towels over the shower rod to dry. So we all tend to use each other's towels. During this time you want to make sure that this does not happen. Even if you pat yourself dry, you risk breaking open any blisters that may form and that can also lead to spreading the rash not only to other members of the family but to other parts of your body.

You will also want to change the sheets more often. While I did not change mine everyday, I was close. You scratch in your sleep and this can lead to you guessed it spreading of the rash.

I know this sounds like a lot to do and it would be much easier to just bite the bullet and go to the doctor. But, if you really are not looking forward to taking a day off work to spend in the doctor's office, then this may be an alternative for you.

Sunday, September 28, 2014

Naturally Treating Sumac Part 1

Almost all of us have come in contact with Poison Ivy, Poison Oak, or Poison Sumac at some point in our lives. While most people suffer some sort of reaction to any of these plants, I have a particular serious reaction to Sumac. 

I have had 2 very serious cases of sumac out breaks. The first time I encountered sumac, I was not aware that I was even handling the vine. I cannot stress the importance of arming yourself with this knowledge. I chose to go visit my family doctor for treatment. She prescribed prednisone in a zee pack for me. I am not a big fan of steroids for a variety of reasons but, I was desperate. This time when I discovered that I had once again contracted sumac, I decided on a more homeopathic route.

While I have stayed away from sumac, it does grow in my yard and since I have pets, the oil from the plant can get on the fur and be transferred in that manner. So be aware of the different ways that you can come in contact with these plants.

I have tried many methods to rid myself of this bothersome malady. I have listed some of them below and the results so that you may decide for yourself if this is a route for you. Please keep in mind that this is not a method that will rid you of this in a week or less. You have to be diligent and consistent to be rid of the rash.

1. Technu and Ivarest.  These are over the counter soaps, foams and creams that can help ease the discomfort. In order for them to work properly, it is best if you use them as soon as possible after coming in contact with the plant in question. I found that the Ivarest medicated anti itch cream helped a great deal. I was able to use the Technu on some places after the rash appeared and it dried up those places. But, with the Technu I did not rinse it off. I just left it on the areas and I think that went a long way towards clearing up the areas.


2. Epsom salt and vinegar baths. These methods also offered some relief. I did not use this method much but it does work. But, you will smell like an Easter egg if you opt for the vinegar baths.

3. Aloe Vera Gel. This is readily available at any local grocer if you  do not have a lot of Aloe Vera plants. I found that this offered as much relief as the Ivarest medicated cream. I kept this in the fridge because it felt better when applied cold. One advantage over the medicated cream is that it is clear so you can apply it to areas that are not covered by clothing.
4. Hot/Cool Showers. I found that the hot showers worked much better for me than the cool showers. You have to stay in the shower for a while but you will feel relief when you exit. With the hot showers, you want to be in water that is VERY hot, almost intolerable hot. You will want to stay in the shower for at least 15 minutes with either method that you choose. With either one, you should be prepared to itch at first. But, the longer that you are able to stay under the water, the more relief you will have when you exit the shower. The advantage to the hot shower is that when you exit, you can visibly see all the areas that have been exposed since they will be quite red from the hot water. 

Please note that these methods are not going to work over night. There are also several things that I have done around the house during this time that has helped with my recovery. I will share those with you in my next post. It has taken me several weeks to overcome this, but I was able to do it with no steroids and that is not a bad thing!


Wednesday, September 24, 2014

Pick Your Own


Living in the south will definitely spoil you if you love fresh produce. There are Farmer's Markets, roadside stands and Pick Your Own Farms everywhere. I like to visit all of these as often as possible. The key to getting the best looking and the "pick of the litter" if you will, is to get there early. I do mean EARLY. Usually in my area by about 9 or 10 in the morning, everything has been handled and picked over.

There are several "pick your own" farms around me that offer everything from tomatoes to nectarines depending on the time of year. If you are strictly organic, you definitely want to ask questions before you grab your buckets and go off to grab those strawberries. If you aren't able to pick your produce yourself, these farms usually sell produce they have picked themselves although the price is a little higher.

Pick your own farms are a great way to supplement your freezer for the winter especially if you are unable to have a garden of your own. It is also a great learning experience for the kids so don't hesitate to take them along! You could also go in "halves" with a friend or family member so that you both can share in the fun of picking your own food.

Below are some tips to keep in mind before visiting a pick your own farm. While these may not apply to all, they are general things that you could always ask about when you call the farm before visiting.

1. Dress appropriately. If you are going to be cutting okra, remember these are "sticky" plants. The leaves can irritate your skin so wear a light weight long sleeve shirt and maybe some light weight warm ups over your shorts. Remember to bring some gloves also.

2. Bring your own buckets. If you call ahead, you can ask how much it costs per bushel, half bushel, etc. While most of us don't have bushel baskets lying around, you can use just about any type of bucket. The farmer will usually have bushel baskets that he will move your produce into to give you the correct price. If you do not have access to a bucket, ask them if they have some you can use. Make sure you ask if there is an additional cost involved.

3. Bring your own tools. These would include gloves, a good knife that you can use to cut stems or a pair of snippers of some sort. Carry something to sit on. An extra 5 gallon bucket, a small stool or anything else that does not require a lot of room. Make sure you also wear a hat and bring that sunscreen!

4. Remember that you will be picking with other people. The rows are close together so plan on having just enough room to move between the rows. The good thing about this is that you can work 2 rows at the same time.

While this isn't a complete list, it gives you an idea of what it is like to pick your own produce at a larger garden than your backyard. The link above is a great place to start your search for a pick your own farm in your area. So grab the kids and those buckets and get to picking!

Tuesday, September 23, 2014

No Diggity My Experiences With A No Dig Garden


Since I don't live in a Martha Stewart Compound, I am somewhat limited as to what I can grow. I have tried various plants of various varieties. I have tried a few methods that are more conducive to the way of life I am trying to achieve. Since I am not a horticulturist nor a soil engineer, my methods have all been the trial and error kind. I am hoping that you can learn from me and I can learn from you.

The last house I lived in had absolutely no trees in the backyard! I truly had a blank canvas to work with. I am a big fan of the "no dig" method of gardening for a couple reasons. The first being I don't have to call all the utility companies and wait for them to come out and mark the spots of all the various lines that run from the house. I also do not own all the equipment required for traditional gardening.

This method is time consuming but I do like the idea of being able plant without all that preparation beforehand. While there are many ways to use the no dig method, I usually take the easiest way so I can get in the dirt sooner. The first time I used this method I took a large tarp and covered the ground that I had chosen for my garden. Like most people, I decided in the summer that I should have planted a garden.This actually worked because I was able to get the ground prepped all winter. You can also just cover the ground with newspapers or cardboard and add mulch or compost or both to get the desired depth. I chose to kill the grass with the tarp because I have used newspapers and the like in my flower beds and I find that this is a sufficient method for smaller areas. Newspapers take about 18 months to decompose so you may have to add more newspapers the following year to keep weeds under control. If you have a compost bin, you can use your own compost. Most nurseries will sell you compost so check around and make sure that you are getting compost and not mulch. The only thing I added to the soil was turkey manure.

My first experience was not a Martha Stewart moment. I knew nothing about companion planting or watering or even if I was planting things at the right time of the year. I know a lot of this sounds pretty dim witted but, I used my local garden center and as you know, they usually put everything out in the spring whether it is the proper time or not. So needless to say, it was hit or miss. I did manage to get tomatoes, hot peppers and bell peppers. Not to shabby for my first time!

I have since moved in to an older subdivision that has more mature trees in the yard. There are also animal issues such as birds, squirrels, cats and the like. I tried my hand at raised gardening this year and the jury is still out on whether I will use this method again or not. I do have some ideas that I am going to try next year but that is for another post.

Happy planting and thanks for stopping by!